(Procedures) Tools We Use

There are several different tools that we use when taking exposures. Some tools are more common than others, like markers. Markers are used to distinguish the left side of the body from the right. Because X-rays are two dimensional images, they are unable to show the left side verses the right side on first glance. That is why radiographers will use lead lined markers to imprint either a L for left or a R for right.

Image result for xray markers

The next tool that we will use is a lead lined shield. These are used to protect the reproductive organs within the body for both males and females. They are used to absorb the radiation that could potentially harm the sensitive areas within the body.

Image result for led shields x ray

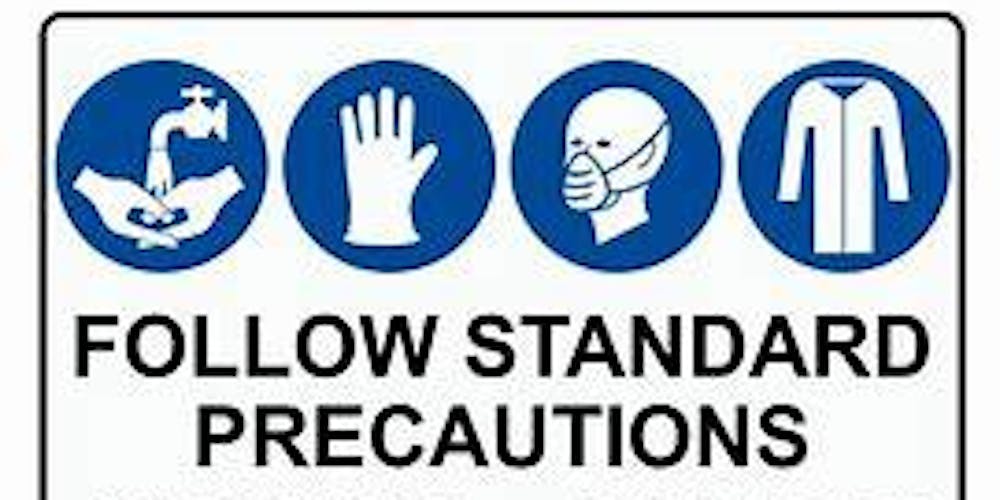
The next piece of equipment that we are able to use to get our images is the standard precaution equipment. These are things like gloves, hand sanitizer, alcohol wipes, and masks whenever needed. These are use to protect the technologist and the patient from the spreading of germs and diseases.

Image result for standard precautions

Another tool that a technologist will use when taking X-rays are the infamous sponges. Sponges are radiolucent and help the technologist by propping the patient on to their side. These sponges are a staple in helping technologist being able to stabilize their patients.

Image result for x-ray sponges

The last tool that a technologist will use in their standard equipment are image receptor holders. These help the technologist when needing to image the lateral aspect of a patient when they can not turn on their side. This can help the technologist to be able to hold the image receptor in a vertical position.

Image result for ir decubed holder

(Procedures) X-rays & Why We Use Them

X-rays are an important aspect of healthcare and are used to help to help diagnose patients. X-rays are useful in detecting different abnormalities within the body. It is a non-invasive way to help see different problems such as tumors, broken bones, and identify the presence of foreign bodies. We are able to use X-rays to aid patients by helping the doctors understand what is going on inside of the body on a macroscopic level.

Image result for evaluation cartoons xray

While X-rays have been around since November 8, 1895, they have been revamped in order to give lower patient dosages while still getting better images. X-rays are able to be used to help identify where fractures are within the body. They also have the ability to see how something is dislocated through the different images that we are able to take. It is not hard to see why X-ray can be one of the most versatile aspects of healthcare.

(Procedure) Evaluation of Images

Image result for evaluation cartoons xray

Image evaluation can be both one of the most easy and difficult things that a radiology technologist will encounter during their career. Images have to be aligned in a specific way in order to capture different aspects of the body. Images need to exhibit specific positioning so that all images have a standard reference point. A lateral wrist has a specific position so that the shapes of the bones are similar to their reference point. The lateral wrist needs to include in the collimation from the ulnar head to the proximal phalanx. The styloid processes should be felt to ensure that they are superimposed. The center of the CR and IR should be in alignment 1 inch below the styloid processes.

Image result for lateral wrist xray

There should be a fair amount of grays to contrast between the black and white parts of the images to ensure an optimal exposure. This can be done by using calipers to check the density of the wrist and setting control factors to ensure that the image is properly exposed. Finally, you need to ensure that the right anatomy is inside of the image and that can be done by ensuring that all of the parts are inside of the collimated field. For this example that would include the radius, ulna, carpals, metacarpals, and part of the proximal phalanx.

(Procedures) Explaining Procedures to Family

When explaining the X-ray procedure to a family, it is important to first understand that they are concerned for the well being of their family member. At the end of the day, they want the best for their family member and hearing that radiation is going to be used can be a little scary for them. There are ways that you can utilize to ease the stress that could be on their minds about the procedure.

Related image

First thing that you can do for the patient and their family is explain the different positions that the patient will be in. This will give the family and the patient an idea of how each image will be captured. Next, I would start by explaining that all precautions will be taken with respect to ALARA and the reduction of radiation. I would explain that a standard chest X-ray would be equivalent to ten days of background radiation. Ideally, this would help ease the family’s anxiety about the procedure. Finally, I would explain that the patient is never radioactive. There is a misconception that radiation will make someone radioactive and explaining that it would not might ease any tension about the situation. The machine produces the X-rays only when you press the button and the moment that exposure is over the machine stops producing radiation.

Image result for radiation xray cartoon

(Procedures) Patient Considerations

For each exam, there are different considerations that have to be taken into account when positioning or moving a patient. This is because there are some procedures that, when preformed properly, move the body in places that could potentially further harm the patient. A patient’s mobility is one of the most important considerations that we as technologists have to keep in mind. A fracture can make it nearly impossible for a patient to be able to get into a specific position.

Image result for broken femoral neck xray

For example, when you take an image of an AP Pelvis, you are suppose to internally rotate the legs 15* in order to make the lesser throcanter in profile and will fully demonstrate the greater throcanter. Now it would not be smart for a patient with a fractured femur to internally rotate the leg at all. By forcing the patient to rotate the leg, it could cause more harm then good. This is why we have special considerations. These considerations are in place to ensure that if a patient can not move into the exact position, then the image can be taken in an alternative way. Other considerations could include the patient’s condition, which is defined by their alertness, respiration, ability to cooperate, and their limitations.

(Procedures) Bridging the Communication Gap

Image result for language barrier

There are going to be times when you and your patient do not speak the same language. This is common especially when thinking about all of the different types of cultures and people that live in the United States. It is important to not freak out and start panicking. There are a few things that you can do to try and communicate with your patient.

Image result for language barrier

One way to overcome the language barrier is to use gestures and hand movements to get the patient to mirror you. You as a radiology technologist can use visual cues to try and guide your patient into the position that you need them to be in. For example, I was with a patient who did not speak English, but after demonstrating the position that I needed her to be in, she was able to read and mirror my body language.

The next thing that a radiology technologist can do is use a language phone that hospitals have. These phones have two receivers that allow a technologist to be able to find someone who can translate for them. While they can be frustrating to use at times, it is still a patient’s right to understand a procedure.

Image result for translation phones in hospitals

(Procedures) Code Words

I know what you are thinking. . . “man X-ray technologists use secret code when talking to one another” and while you are not wrong, we have an understanding of common words or phrases to mean different things.

For example, when we talk about different aspects of the body, we will often times talk about different planes on the body. This means that when talking about the coronal plane, we are talking about what separates the front (Anterior) from the back (Posterior). When we talk about the plane that separates the top (Superior) from the bottom (Inferior), we will often use the word transverse plane. Finally, when we want to talk about the left to right in positioning, we will talk about the sagittal plane. Each word is used to describe a place in space on the body. When discussing movement, there are even more terms that we will use to position a patient. These are some of the following that we will use to simplify the type of movement we are seeking:

(Image Analysis) Role of Radiographer in Image Analysis

While some might believe that X-ray technologists are just button pushers, that is not the case. There are responsibilities that we must do behind the scenes in order to give the radiologist images that they will be able to read. First and foremost, if image analysis was not your cup of tea in school, then get ready because it does not end after classes end. We have to continuously use what we are taught in image analysis to give diagnostically acceptable images to the radiologist. This means that every time you take an exposure, it is your duty to ensure that it is the best possible image with all of the anatomy where it needs to be.

Image result for lateral elbow

For example, imagine you took this exposure and for some reason you were unsure if it was diagnostically acceptable. There is a list of criteria that each position must have. One way to check to see if the image is good is to do an image analysis of the image. So for an elbow, there is a list of factors that need to be met in order for it to be a good image. This is where image analysis comes into play.

LATERAL ELBOW NEEDS TO HAVE
Open elbow joint in the center of the IR
Elbow flexed at 90*
Superimposition of humeral epicondyles
Radial tuberosity facing anteriorly
Olecranon process seen in profile
Radial head partially superimposing the coronoid process

As you can see, this elbow matches up with all of the image analysis except for the open elbow joint being in the center of the IR. This means that while it is diagnostically acceptable, there is room for improvement. It is important that we do this with each image so that we can create better images in the future.


(Image Analysis) Anatomy on Radiographic Images

Image result for pa xray hand

For this example, I will be choosing a hand X-ray.

When taking an X-ray, it is important for the technologist to fully know what they are looking at when taking an X-ray. For this reason, we will take anywhere from 1-3 different anatomy courses during our education. The first thing that you should do after taking an exposure is ensure that all of the appropriate anatomy is on the image. For a hand, you want to see that all five phalanges are on the image. You want to ensure that the radius and the ulna are seen below, and you want to make sure that the joint spaces are open. Finally you can go through the image and check each of the anatomy if you have time. So for example, you can go one by one through the different bones to ensure that you have them all.

A.) Distal phalanx
B.) PIP joint
C.) Proximal phalanx
D.) MCP joint
E.) Metacarpal
F.) CMC joint
G.) Proximal phalanx
H.) Distal PIP joint
I.) Middle phalanx
J.) Proximal PIP joint
K.) Proximal phalanx
L.) CMC joint
M.) Metacarpal
N.) CMC joint

(Principals) Magnification Evaluation

When taking an X-ray, it is important to understand that the distance between an object and the image receptor can cause an image to become magnified. This magnification can be evaluated mathematically with the equation of M=SID/SOD. SOD stands for SID-OID mathematically. So imagine that there is an object that is hovering 10 inches above an IR and the distance from the IR to the CR is 40 inches.

The Math to Show Magnification

M= 40/ (40-10)

M=40/30

M=1.33

Meaning that the image will appear 1.33 times the size it would have been if it was placed flat on the IR. This can cause complications because it can force an image to look differently than it would naturally on an IR.

Design a site like this with WordPress.com
Get started